Showing posts with label lip balm. Show all posts

Thursday, August 28, 2014

August 2014 Ipsy Bag & Look

If you have never heard of Ipsy, check out their website to learn more!
This is my second Glam Bag! I like the products, but they are super small sample sizes this month. I know it's a sample subscription, but boy are these tiny! lol

Take a look at everything I got in my bag this month, with swatches and more info. I also created a look with all the products from the bag!

The bag this month is round and white with orange polka dots and zipper. The theme is "beauty schooled" and it reminds me a little of a pencil case. :) 


The Products

1. URBAN DECAY - Perversion Mascara
2. LORD & BERRY - Silk Kajal Kohl Eye Pencil
3. COASTAL SCENTS - Shadow Palette Sample - Set 28
4. ABSOLUTE - You're the Balm - Green Apple
5. DR. BRANDT - Pores No More - Pore Refiner

Color Swatches & Info

1. URBAN DECAY - Perversion Mascara

"Get bigger, blacker, badder lashes with our ultra-creamy, lengthening and volumizing mascara. So intense you might need a safe word, Perversion glides on and gets you sexy in one stroke. (Yet it won’t quit until you say when.) It’s insane how black it is…the purest, deepest, most intense black color imaginable.  Perversion has a creamy, full-bodied texture that’s not too dry, not too wet. This allows just the right amount of “pull” so it glides through lashes. The result: incredible control for insane lashes. Go ahead and pile on coat after coat. Want to apply more before you go out at night? No problem. Even if it’s been all day since you applied, more Perversion always means more beautiful lashes. Our formula NEVER gets brittle or clumpy." 

I actually do like this mascara... but I don't think I want to pay $20 for it! It does seem very creamy though. It glides on super smooth. I didn't notice clumping either. The results below are after only one coat of Perversion.


- - - - - - - - - - - - - - - - - - - -

2. LORD & BERRY - Silk Kajal Kohl Eye Pencil

"A kohl eye pencil that lines, defines and shades the eyes with rich colour and a silky-smooth finish.
Ophthalmologist tested and gentle enough to be used on the inner eye."


Tiny little pencil. The full size is $15. I would have to agree with the description above, but I wouldn't want to use this anywhere it might come into contact with wetness. From my experience with kohl pencils, they smudge pretty easily, yeah?


 - - - - - - - - - - - - - - - - - - - -

3. COASTAL SCENTS - Shadow Palette Sample - Set 28

"Coastal Scents Shadow Palette Samples are an ideal way to try these highly pigmented, stunning shadows. Each miniature-sized palette offers four specially selected, complementary shades to create a variety of looks."

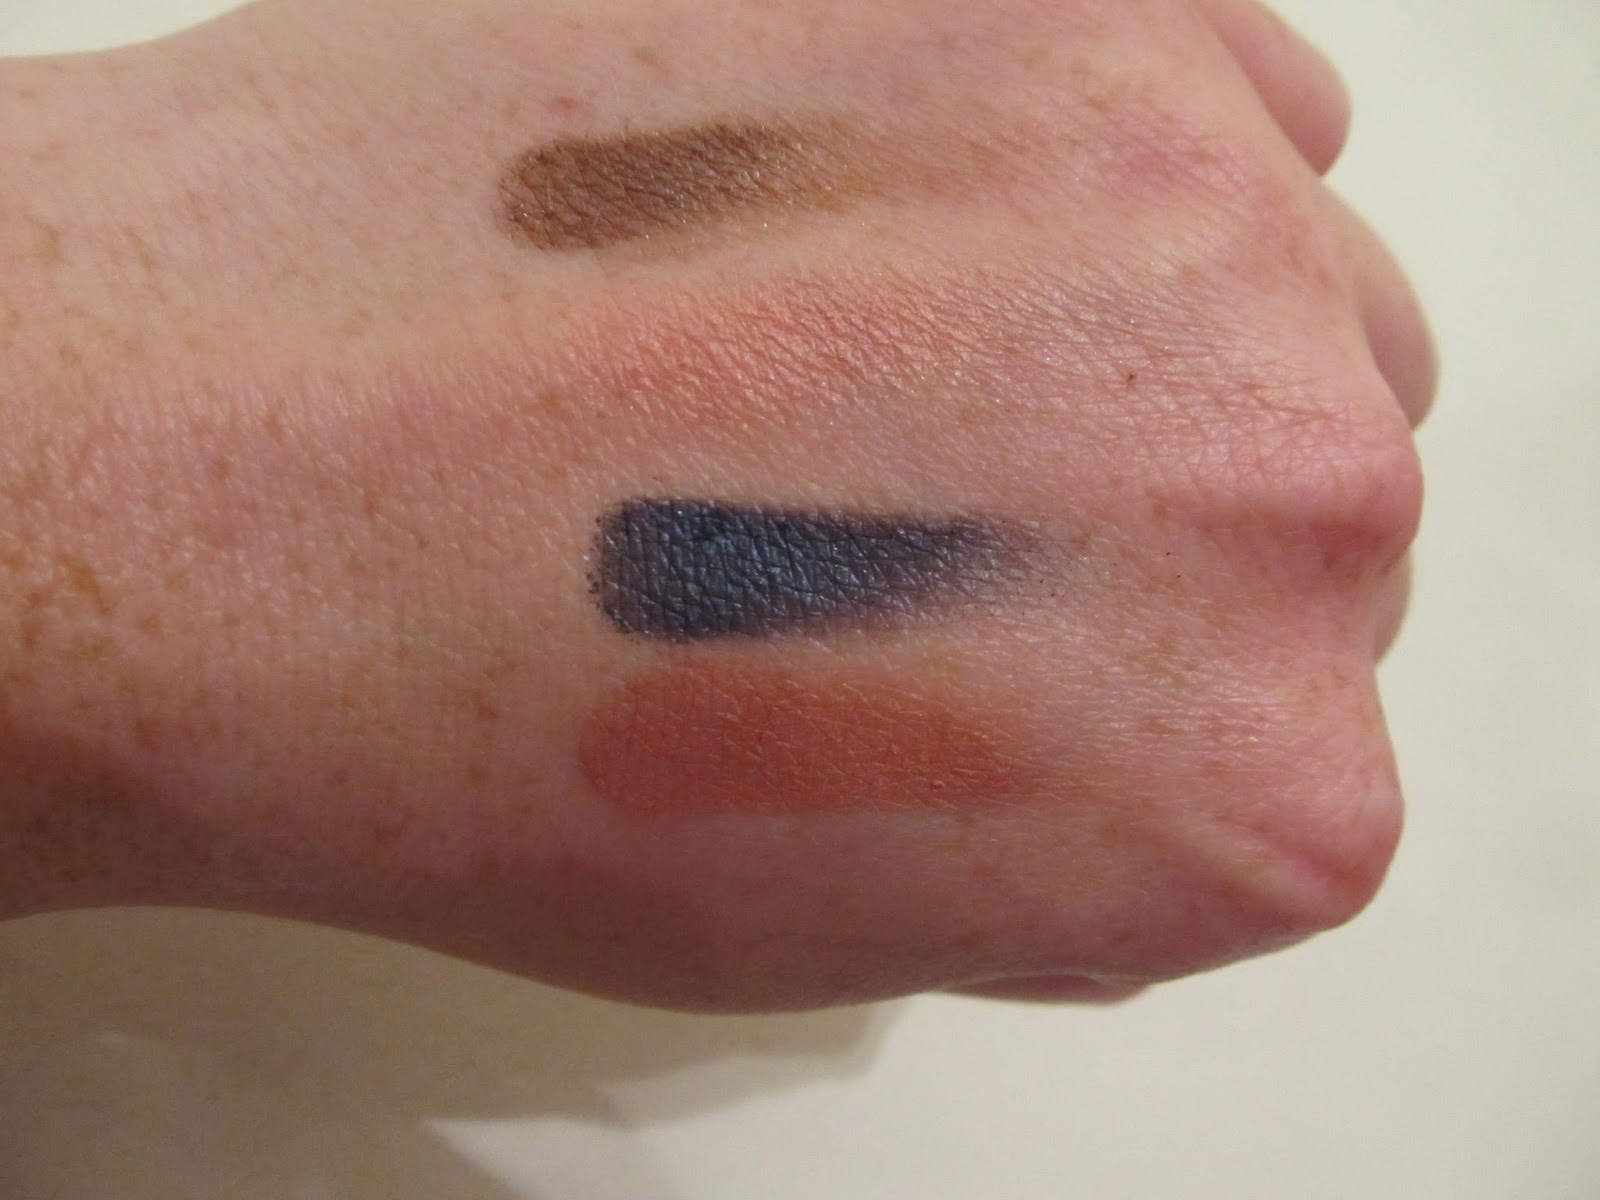
I got the more tame colors this round. Very pretty though! They are super soft and the pigmentation is great! I could use these colors in quite a few different combinations too. The colors in this palette are: Cocoa Diamond, Reef Coral, Rainstorm and Bronze Peach.

  - - - - - - - - - - - - - - - - - - - -

4. ABSOLUTE - You're the Balm - Green Apple

"Treat your lips with the ultra-moisturizing Duo Lip Balms from Absolute New York. Our lightly tinted, creamy, conditioning formula softens, smoothens, and protects lips for a seriously kissable pout. Discover this must-have duo for sensationally soft and luscious lips!"

 I recieved green apple, but it reminds me more of watermelon. In my opinion it smells pretty yummy and goes on thinly and smoothly. Popping this nomnom in my purse. It has a very light pink tint. Also the only full sized product in this months bag.


  - - - - - - - - - - - - - - - - - - - -

5. DR. BRANDT - Pores No More - Pore Refiner

"A cult favorite, Pores No More Pore Refiner Primer is Dr. Brandt’s quick fix for flawless, photo-ready skin. It is the miracle base to create the perfect skin canvas for long-lasting makeup and well-preserved skin. This velvety formula absorbs excess oil, minimizes pores, blurs fine lines and is resistant to sweat and humidity. Prime, touch-up and treat while perfecting your makeup."

Well, I was impressed. I hate my big pores and I saw a noticeable difference very quickly when I put this just on one area of my cheek. I'll only use it on special occasions because this baby is $45 for an ounce! It is a light flesh tone in color and smells a bit like an acne cream medicine. I can see why it's one of their best sellers.


The August 2014 Glam Bag Look

Here ya go! I used the Coastal Scents eyeshadows, Lord  & Berry eyeliner and the Urban Decay mascara. :) Quite a nice "natural" kind of look. Simple for back to school too. Can't go wrong with some nice neutral eyeshadow. Brown shades are always my go to colors.


Wednesday, November 27, 2013

DIY Christmas Advent Calendar

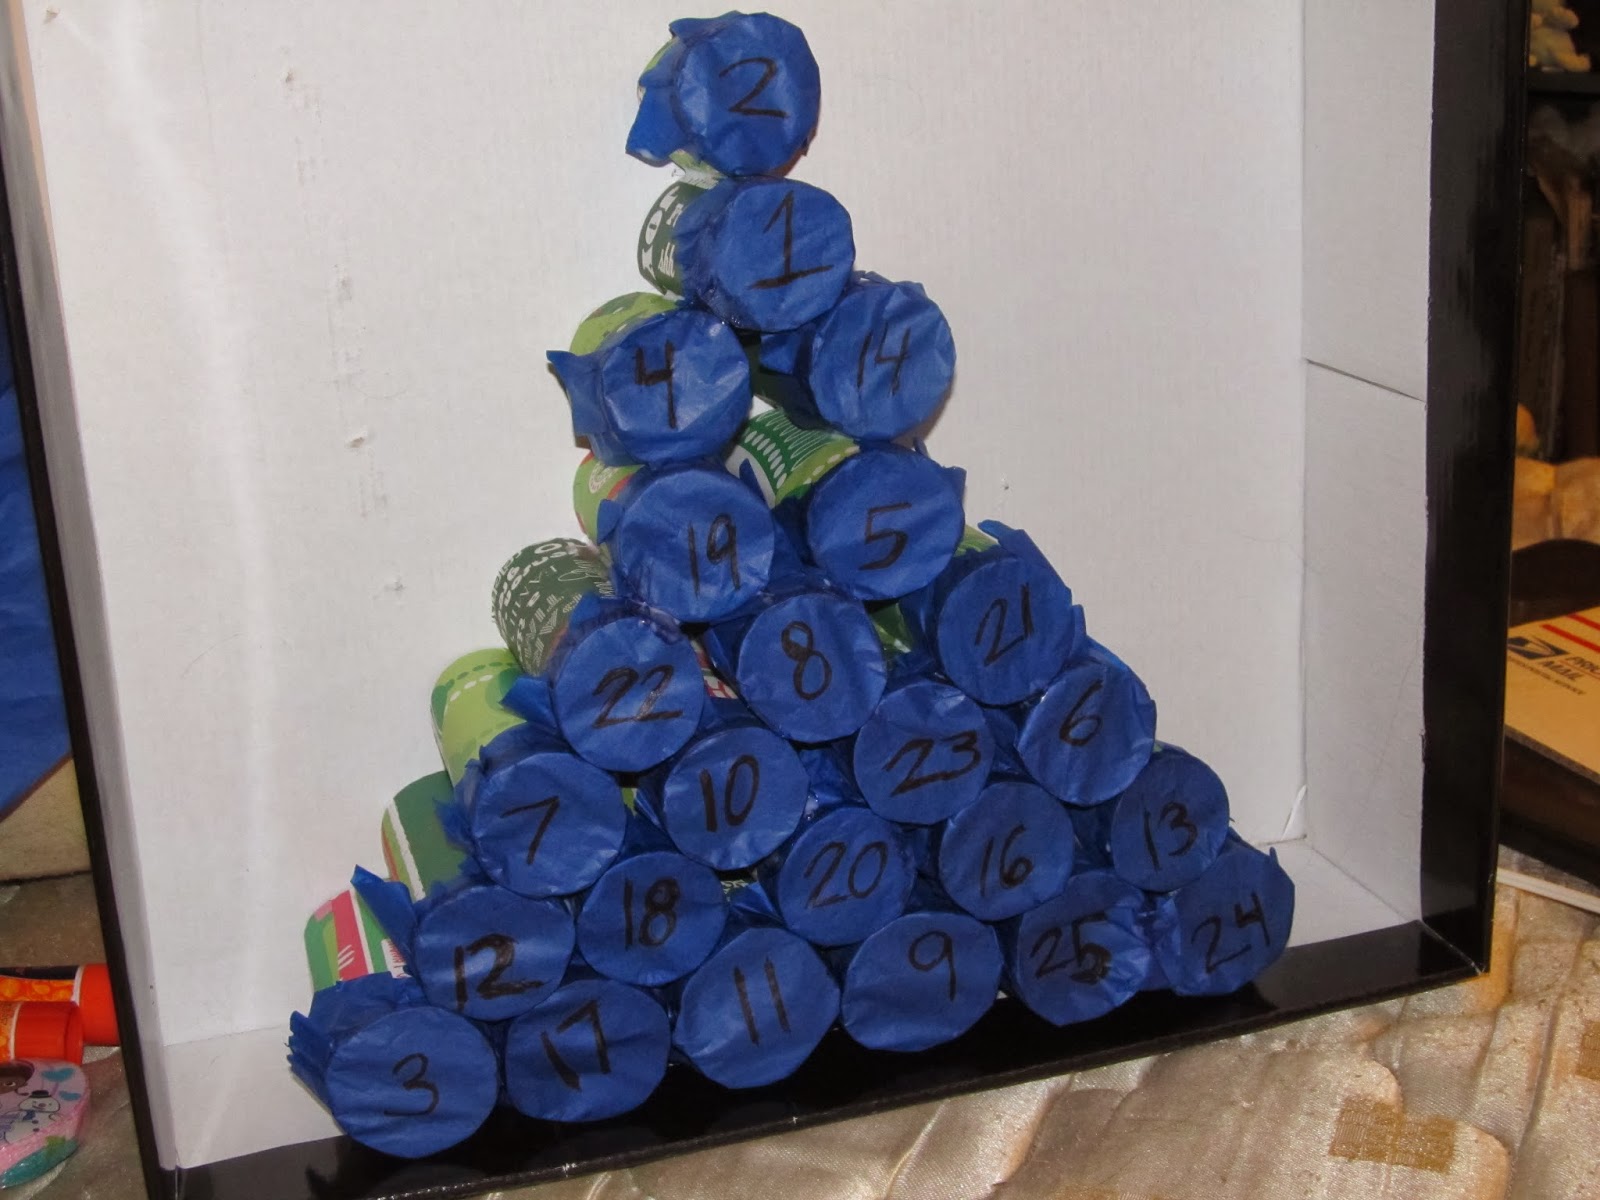
This year for Christmas I decided to do something really fun for my 6 year old niece! I am usually pretty broke, but just like her birthday, I wanted to leave her with that lasting impression of, "Wow, I have the best aunt"! Hahaha! I shop at Dollar Tree, where everything is $1...or sometimes two for $1! For her birthday I filled a gift bag for only $12. She got 12 different things and her smile got bigger and her voice more excited as the gifts kept coming out of the bag. It was like she was a young Mary Poppins. I wanted to do something similar for Christmas! What better way than an advent calendar? She gets 25+ gifts! I shopped at Dollar Tree and only spent $10 on her gifts. I collected toilet paper and paper towels rolls from our home and my sisters to hold the gifts. I used left over tissue paper, scrapbook paper and the various glues we had lying around. I just so happened to have an old box from a previous gift I had received to be the backing. So I really only spent the $10 on her gifts. :)


I managed to get Christmas puppy and kitten stickers (which I cut out separately so they fit), plastic rings, clay ornaments, Starburst, girly erasers, hair ties, a Doc McStuffins washcloth, a windup walking penguin, a package of temporary tattoos, and then added my diy lip balms and a homemade bracelet.

First I collected the paper rolls! I suggest bringing one to the store with you to make sure the gifts fit inside! I forgot to, but still did pretty good! I didn't have enough, so I cut  few to make them shorter. My tree is set up to where the numbers are in a random order. I just made sure that smaller gifts went in the shorter tubes! Other materials I used where Christmas scrapbook paper (to wrap the tubes, used 6 different mostly green patterns), scissors, a pen, yellow card stock (for the star topper), tissue paper (to cover the end of the tubes), a hot glue gun (to glue tubes together),  an extra strength glue stick (to put paper on the tubes), and regular white glue (to secure the tissue paper).

So I cut the scrapbook paper into fourths. Then I covered each piece in the extra strength glue stick and rolled it onto the paper roll. This was the longest step! It took me about an hour. lol You can also just use paint or leave them plain though. After the roll was wrapped, I cut off the excess paper on the ends.


 After all the tubes were wrapped, I started cutting out squares of tissue paper and then adding the numbers to them. At this point I realized that one item did not fit in the tubes! So I left out a number and wrapped the little gift separately so it looked like a gift under the tree. :) To secure the tissue paper to the ends of the tubes, I used a little bit of the regular white glue around the edges of one end and lightly pressed the tissue paper to the glue. I tried my best to keep the numbers centered.

 Once all the tubes were covered, I used the hot glue gun to glue the bottoms/sides together in a Christmas tree shape! When turned around, I could see the numbers through the tissue paper. That made it easier to spread out the gifts evenly so she wouldn't be getting too many of the same kind of gift really close together.

 I stuffed everything in the back and then carefully adhered it to a big box (one side cut off) that I had lying around that another gift came in. lol This way nothing could fall out! I also have seen people just trace and cut a piece of cardboard to fit the back or use felt. :) I glued a cut out star above the tree and then wrote Merry Christmas and decorated with more drawn starts. I taped the separately wrapped washcloth to the base of the box to look like a present under the tree. This tree took me about 3 hours to complete!

 I pinned lots of ideas on Pinterest!
Here are some other cool ideas that I found that also helped to inspire me when I planned on this project!

[3] Grains of Earth (this one has several great projects!)

Thursday, November 21, 2013

DIY Flavored Lip Balms & Crayon Lip Color

I've seen the videos before, but I finally decided to try it. I made lip colors with Crayola crayons! It was very cool and super easy to do. I looked for a very simple recipe and found one with only 2 ingredients; crayons and coconut oil! I used the video below from Madisradd to help me out with the process. :) There are other videos out there and you can add other ingredients as well. Go take a look on YouTube! I also made some easy flavored lip balms too. I've got a base mixture that is easy to melt and add too. I decided to do this mostly because it looked really interesting, but also because Christmas is coming up and I thought my 6 year old niece would get a kick out of the idea that I made some of these from crayons. lol I am making her an advent calendar this year. I will be doing a post on that soon too! :) I thought she would love receiving these as some of her little gifts.


First thing... you need a container!
I emptied out old and/or cheap makeup that I didn't use anymore. I was left with some great little jars and also eye shadow palettes. You can also buy containers in many online stores or craft stores! I will probably have a post up later about reusing old containers and how to clean them for use in "depoting" other products. :)


Next I got some of the things I needed according to the video. A pot and small glass container to melt my ingredients, measuring spoons and a stirring stick. Of course, don't forget your crayons! I also have a lip balm base (white jar with pink lid) and decide to make some flavored lip balms. The base is from Elements Bath and Body. To add color and shimmer to those lip balms, I sometimes use lipsticks (or in this case a cream blush stick) or eye shadows. The base is ready to add to and easy to melt.


To make the balms with the base from EBB, I also use candy flavorings and this pipette to put the mixture into the containers. :) The flavoring oils are very cheap and I bought them at Walgreens. There was a pretty big flavor selection. I have things like peppermint, watermelon, tangerine, mango, strawberry and banana cream. As a note, make sure not to get the melted base too hot before adding an oil. It makes it separate and not mix very well. You might see little bubbles of flavor oil.

 
My finished products! At the top is 4 different crayon lip colors. The swatches are below. The colors ended up being pretty buildable. I found that the blue was very soft. Perhaps from having too much coconut oil and not enough wax? I filled two tiny jars with the coral and light purple colors to add to my niece's advent calendar (one is at bottom right). I made the dark purple with crayons for myself. All of these obviously smell like coconut. The other lip balms in the center and to the right are made from the meltable base from EBB. The dark pink has the cream blush added to it for color and a little bit of hot pink eye shadow to make it shimmery. I added blueberry and pomegranate flavor oil too it. The lighter color just had a light pink eye shadow that added a little color and shimmer. I added butterscotch flavor to that one! It's brown, so it changed the color slightly.