Tuesday, April 21, 2015

Review: Capture the Moment

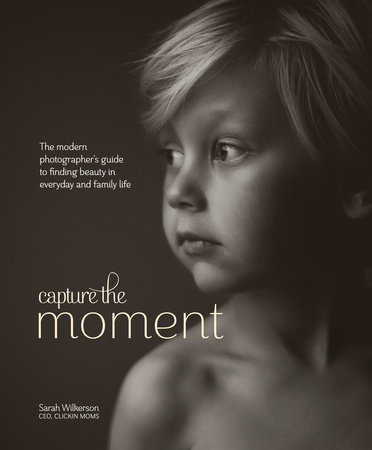
http://images.randomhouse.com/cover/9780770435271?height=450&alt=no_cover_b4b.gifPhotography is one of my favorite hobbies! Here is another beautiful book that I was sent to review by the CEO of Clickin Moms, Sarah Wilkerson. As the cover states, it is "the modern photographer's guide to finding beauty in everyday and family life."

Capture the Moment by Sarah Wilkerson
Published by: Penguin Random House on April 7th, 2015
Pages: 246
Format: Hardcover
Source: Blogging for Books
 

About Sarah Wilkerson:

SARAH WILKERSON is CEO of Clickin Moms, which was founded by professional photographer Kendra Okolita in March 2008 and has grown to become the photography industry’s largest female-photographer social network. Wilkerson, a graduate of Duke University and the University of Texas School of Law, lives with her husband, three sons, and a daughter. Wilkerson teaches advanced courses on photography composition and creativity.

Book Synopsis: 

This modern guide to photography pairs big, bold images with short, focused tips for translating everyday life into stunning works of art. Featuring contributions by the members of Clickin Moms, the photography industry’s largest social network of female photographers, this guide captures the beauty of family life—whether it’s a child’s unfinished bowl of cereal or a sunlit trip to the lake. With tips progressing from elementary to advanced, this book is perfect for amateurs and professionals alike, covering equipment, composition, posing, low light, natural light, black and white, still life, and lifestyle photography. Assignments for experimenting with lighting and shooting locations round out the chapters, providing photographers with both the inspiration and skills they need to document those unforgettable, frame-worthy moments in time.

My Thoughts and More: 

I've never taken a photography class before, but I have relatives that have. I would go on what tidbits of information they would share, maybe some things I picked up online... I'd go with what I just thought looked nice. When I opened this book, I saw many photos that really told me a story, and thus inspiring me to grab my camera and find a worthy subject to photograph. Capture the Moment has big, bold photos and short tips that are straight to the point. It's not a long boring manual that you'll want to put down after a few minutes, and it's written in a way that photographers of all kinds of skill levels can understand.

The chapters include: natural light, composition, storytelling, fine art, black and white, and low light.

I also appreciate the short reference section at the end that helps explain some more technical photography terms. This book kind of makes me want to take my camera everywhere and really capture my family's life in stills. I will use the tips and tricks in this book no matter the subject I am photographing... although now it has really inspired me to take more photos of my four nieces! This is definitely a book I will come back to again and again.

Short Book Preview: 

Click the images to see them larger. :)


Links & More:

Thanks for visiting! I hope you liked my review!
To purchase this book and see more of the inside, visit here!
Disclamer: I received this book from Blogging for Books for this review! :)

Monday, March 23, 2015

Review: The Postage Stamp Vegetable Garden

I jumped at the opportunity to review this great little gardening book! It's all about planting a thriving garden in a small space. This 1975 published bestselling book has been completely revised for 2015! Keep on reading to learn more about this book, the author, my opinions and get a quick preview of some pages! :)

The Postage Stamp Vegetable Garden by Karen Newcomb
Published by: Ten Speed Press in 2015 (1975, 1999).
Pages: 218
Format: Paperback
Source: Blogging for Books
 

About Karen Newcomb:

KAREN NEWCOMB has contributed to and co-written eight gardening books with her late husband, Duane. She is a lifetime vegetable gardener,  garden blogger, and avid writer, and has been a writing teacher for more than twenty years. She lives in Rocklin, California.

Book Synopsis: 

This classic gardening bestseller (over 500,000 copies sold) uses ecologically friendly, intensive biodynamic methods to produce large amounts of vegetables in very tiny spaces. Revised for an all new generation of gardeners, the 40th anniversary edition includes brand new information on the variety of heirloom vegetables available today and how to grow them the postage stamp way.

     To accommodate today's lifestyles, a garden needs to fit easily into a very small plot, take as little time as possible to maintain, require a minimum amount of water, and still produce prolifically. That's exactly what a postage stamp garden does. Postage stamp gardens are as little as 4 by 4 feet, and, after the initial soil preparation, they require very little extra work to produce a tremendous amount of vegetables--for instance, a 5-by-5-foot bed will produce a minimum of 200 pounds of vegetables....
[READ MORE]

My Thoughts and More: 

As soon as I read the introduction I knew this book would be helpful to me. "To accommodate today's lifestyles, a garden needs to fit easily into a very small plot, take as little time as possible to work, require a minimum amount of water, and still produce prolifically." How true! Many people today would love to grow some of their own produce, but don't think they have the time or dedication it would take to grow a large garden. My family falls into that group. As much as we'd like a garden, we could only think large scale. How would we find the time and energy to plant a vegetable garden to feed 9 people?? Well... now I know how! Thanks to The Postage Stamp Vegetable Garden, I feel greatly inspired to start on my own garden with some confidence.


I love how right away it suggests drawing out a plan for your garden. This is something I already love to do! I am always drawing my plans on paper for better visualization. The author suggests the smallest garden bed be 4 by 4 feet and the largest 10 by 10 feet. Certainly a great workable area for most! The first chapter includes information on choosing what kind of garden you want to grow, what to plant, and how you should arrange them. There are also some great illustrations to give you examples of how your garden layout could look. The second chapter is all about getting a good soil mix. Chapter 3 advises on methods to prepare the ground and maintain good soil. In chapter 4, you'll learn "when and how to plant". Chapter 5 is a quick how-to on watering. In lovely chapter 6, you will find great information on heritage veggies and herbs to grow in your garden. I love this one the most. She uses some little stamp symbols to rate plants, as well as thermometers to let you know what season is best for them. Not only that, but she includes information on planting numerous varieties of some plants, typical problems, harvesting and even storage. Chapter 7 is another quick one about plants that "like" each other and grow well together. Chapter 8 sums it all up with how to control pests, disease and critters.


There is even more good info in the back of the book. You'll find an appendix called "How to Compost, and another with a great list of seed sources. Lastly a glossary and an index. :)


Overall, I love this book and I can't wait to put it into use! Thank you Karen Newcomb for a lovely resource for this beginner gardener and her family. I think many people will find this book quite useful and I totally recommend it. I find the information very helpful and not overly complicated or confusing.

Short Book Preview: 

Click the images to see them larger. :)


Links & More:

Thanks for visiting! I hope you liked my review!
 
To purchase this book, check it out on Amazon!
 
Disclamer: I received this book from Blogging for Books for this review! :)

Tuesday, March 17, 2015

Hello, Spring? Is That You? [Pin Post]

I almost can't believe it... 50 degrees, and above zero this time! Ah, yes. Spring will soon be upon us! According to the calendar, the first day of spring is March 20th. In honor of the coming wonderfulness that is spring, here are some wonderful DIY pins from Pinterest! Get inspired, people! I've separated them into categories. They are all different things that I associate with the spring time. Enjoy and I hope you try some! I know I will!

Flowers/Gardens


Birds


Bunnies

Spring Cleaning


Crafty Kids/Spring Break


Monday, March 2, 2015

Review: Monstrously Funny Cartoons

Look what came in the mail! I'll be doing a review on this step-by-step drawing book by Christopher Hart. Keep on reading to learn more about this book, the author, his other works and get a quick preview of some pages! :)

Monstrously Funny Cartoons by Christopher Hart
Published by: Watson-Guptill Publications on October 14th 2014.
Pages: 152
Format: Paperback
Source: Blogging for Books
 

About Christopher Hart:

CHRISTOPHER HART is the world's bestselling author of drawing and cartooning books. His books have sold more than 6 million copies and have been translated into 20 languages. Renowned for up-to-the-minute content and easy-to-follow steps, all of Hart's books have become staples for a new generation of aspiring artists and professionals, and they have been selected by the American Library Association for special notice.

Book Synopsis: 

Learn to draw the silliest and scariest monsters, zombies, vampires, witches, mummies, and other creepy cartoon favorites. -- Cartooning master Christopher Hart teaches aspiring artists all the drawing tips and tricks they need to create laugh-out-loud renditions of their favorite monsters and scary creatures. This jam-packed cartooning guide shows readers how to capture the lighter side of these creepy creatures by combining them with Hart's incredibly popular cartoon drawing style! ... [READ MORE]

My Thoughts: 

What a fun book! The bright colors and layout drew me in right away. I am not the best at drawing realistic scenes, but I love to doodle and draw cartoons. I thought this book full of "monstously funny cartoons" would be right up my ally! As promised, there are zombies, vampires, witches, aliens and more! The books takes characters that would usually be scary, and makes them into great humorous cartoons. :)

Besides seeing the basics of how to draw various cartoon monsters, you get tips and tricks for drawing different facial expressions, setting up a great scene for your characters, and more. I really enjoyed the bit of humor in this book as well. It makes it even more fun to flip through. It kept me interested and wanting to really check out each and every page.

I found the tips really helpful, especially since I am no professional artist. Among some of the tips are tricks to draw better hands, good line flow, eye details, proportions, props and the dynamics of a good pose. I think this book is very inspiring! I will certainly be going back to this book for reference and when I feel like being artsy. I love all the little monsters inside and can't wait to try and put my own spin on them!

I think this book will appeal to teens and adults, whether more of an advanced beginner or even a professional trying to broaden their horizons. It's different than a lot of "how-to-draw" books that I've used before. It's more fun and Christopher Hart will encourage you to make your own cartoon drawing style as opposed to the more exact step-by-step, single pose, draw exactly this, type of books. :)

I am very interested in a few of his other books, especially the Manga for the Beginner: Kawaii! If you are interested in drawing manga or cartoons at all, I encourage you to check him out.

Short Book Preview: 

Click the images to see them larger. :)


 My quick and messy try at some of the characters! I used a pen, so I couldn't erase anything... Much harder that way. I recommend using a pencil. *wink* If I did that, I would have been much happier with these. lol

Links & More:

Thanks for visiting! I hope you liked my review!
 
Check out Christopher's website to see his books, video tutorials and to read his blog. :)
You can also view all of Christopher Hart's books here!
 
Disclamer: I received this book from Blogging for Books for this review! :)


Saturday, December 27, 2014

Watercolor Haul

Alas! I have a new camera! Special thanks to my parental units for getting me a new camera for Christmas after my outdated one decided it didn't want to function properly. I am beyond happy. I really missed taking pictures!

My boss got me a Hobby Lobby gift card for Christmas, so I went straight away to pick up some new watercolor supplies! I would have preferred the better quality paints, but I didn't want to spend a fortune. I decided since I am no professional, I am going to try "The Fine Touch" brand from Hobby Lobby. I also picked up some brushes, paper pads, a little sealable pallet and a waterproof ink pen. Get closeups and more info below! :)

I got a cheap set of $5.99 round camel brushes in the sizes 2, 4, 6, 8, 10 and 12. (The Fine Touch)
I also got a $7.99 with a size 2 liner and rounds in the sizes 8, 16 and 24. (Master's Touch)
My little plastic folding palette was $2.99. (Master's Touch)
I picked up a $3.99 Pitt Artist Pen too. I got the 0.6 mm fine tip with black India ink. (Faber-Castell)


Next, my cheap paints! lol I got this $13.99 set of 24 tube watercolor paints. (The Fine Touch)
I will have some color swatches below! You can also see them in my palette.
I got 6x8 and 9x12 paper books too.


Here is what the palette looks like when it's open. There are 20 paint wells and then 5 other areas to mix colors. There are also little brushes holders and a place to place your thumb. Pretty decent for the price. It will work for now! I squeezed in my paints and will wait for them to dry. They can be activated again with water. :)


 Here are some quick color swatches of the paints. I got most of them here. I think there was one blue and then the gray and black that didn't fit into my palette. I might end up scraping out a red or two later to make room for those though. A few of the reds look quite similar. I didn't use a whole lot of paint and there is still plenty, so it won't be much of a loss. :)

All together I spent about $30 on everything. I used a 40% off coupon on my paints!

I will share some of my little paintings soon. :)
I'm glad to have the always important camera back so I can start sharing again. See you soon!

Monday, November 24, 2014

Apologies!

I haven't been posting lately. One of the bigger issues is that my camera is no longer working.
Quite depressing! But hopefully after Christmas I can start up again. :)


Tuesday, October 7, 2014

Easy Show Ribbon Display

If you compete in anything or show animals, you are bound to collect some ribbons! I've been showing rabbits for about 10 years and have a rainbow assortment of ribbons. It's been a long time since I've had any out on display. I have a large trunk at the foot of my bed that houses all of my awards, but I decided I wanted to display some of my favorites and add a little color to my room. :)

Materials:
This is a super easy way to display your ribbons! The only things I used were two nails (or thumbtacks), and a piece of chain used for lighting. You can find all types of linked chain like this for cheap. If not, anything similar and sturdy will work!


This first part might require a helper. Just stretch out your length of chain until you have the desired drape effect, or pull it taunt. However you like! Get it centered and level, then add your nails or thumbtacks into the wall. :) Hook on your chain and taadaa!


- - - - - - - - - -

Well... that was simple enough! Now add your ribbons!They can come with all different types of hangers on the backs. I had ones with string loops, hooks and pin enclosures. They all worked for this project. :)


- - - - - - - - - - 

Here are two different hook backs. These are easy, just hook them wherever you like.


- - - - - - - - - - 

 Loops can be a pain, but I doubled up the string and tied some knots That way they didn't hang so low. These were put on each end to cover the nails in the wall and the ends of the chain. With a little bit more work they can be tied to a link of the chain. OR you can forget the string and use a little bit of crafting wire or even a wire Christmas ornament hook. Use the pre-punched holes in the cardboard backing to hang it. :)


- - - - - - - - - -

This is a ribbon with a pin backing. Another easy attachment! Just like pinning it to fabric... honestly easier! lol


See, that was super easy! I didn't want to spend a bunch of money on ribbon displays I've seen online, so when I saw that chain just sitting around from an old light fixture we had... I knew I could use it. :3 Hopefully it has given you some ideas too! See you again soon!

Sunday, September 7, 2014

Books, Books, Books!

Reviews and hauls and such! Goodbye summer... it was nice knowing you. Lots of reading time now though! lol ;)